Implementing a Torch/Flash Light and Battery

In my lesson I had the objective of implementing a torch and a battery in my soon to be finished horror map on Unreal.

My first thoughts was to add on a torch was that I should go through the coding and remove the part that makes the gun fire as of how my torch, which at this stage is a gun, won’t be firing in the game as of how it wouldn’t be a torch. As shown in the screen shot I have removed the links between two of the pieces of coding as of how they have the power that makes the gun shoot.

Then I had to have a look at the viewpoint of the player so I could add a spotlight as that is the first form of light that would be close to being a torch before I implement an actual torch.

With the spotlight I had to place it at the end of the gun so that it can project the light at the end of the gun as that would make it torch like. With the spotlight added at the end of the gun I had freedom to change some of the features of the spotlight.

With the addition of the spotlight it meant that I was able to allocate a key on the keyboard to a button that can make the spotlight turn on and off.

My next objective was to add in a battery that be used to gain more power for the spotlight. So when thinking about the battery I had to create a model of the battery on Maya.

With the newly made battery model I then had to take into consideration the look of the battery in the sense that I needed to create a UV map of the battery so I can add a diffuse to the UV map so it can be imported back into Maya looking good.

Once that was done, I then moved on to adding in a battery meter as that is needed as of how at the previous stage there is only signs of the battery power on the top left hand corner in numbers, the reason that had to be changed was because if there’s a power bar for the battery power then the player would have a better understanding of how much battery power they have left.

With the idea of a battery bar I had to at first think about creating a small picture of a battery on Photoshop and that I should make sure that there’s no background and that the battery is a noticeable colour as of how it would be contrasting with the dark background of the horror game.
Work Flow & Sword Finishing

When talking about Work Flow you instantly think about a routine of which has certain points in the routine that become individual objectives which result in the main objective being completed.

The easiest way for me to explain work flow to you is by giving an example. This is the layout of a work flow.

Image result for basic workflow

Imagine you had the task of creating a weapon for a character of which would be later on used in a game. Out of that information you can tell that your first main objective is to think about and design your wanted weapon. In a work flow you have many mini objectives that become in need of being completed to help complete your main objective. In this case your mini objectives would be, the design of the weapon, the modelling of the weapon, Unwrap the weapon, texture the unwrapped weapon, apply your texture to the weapon then finally you will need to import your textured weapon into an engine to be coded in to the main game. you importing the weapon in the main game would be your main and final objective as it would result in a continuous cycle of creating new weapons.

That task is similar to that of my own as of how this is a basic explanation of my work flow plans on creating my very own sword. When first creating my sword I ended up working off of an originally made picture so I had a nice safety buffer for a already made sword.

When I had my first picture of a sword I then had the task of creating a model that looked similar to that of the picture. In this case the picture I found off of the internet was my design part of my work flow as I then went on to the modeling part of it by creating a model.

As the lessons went by, my sword started gaining some form of structure as of how it looked similar to that of the picture.

Once my model of the sword was created I had the next task of unwrapping my sword by creating a UV map of the sword of which I could then customize and edit to make it look aesthetically pleasing and look similar to how I originally wanted it to look. 

From my previous screenshots you can see the type of sword mine is with how it’s textured in a very bright and gem heavy look (also the only reason there’s a black background is so I can see the guidelines of my sword when texturing it). When I had completed my wanted texture I then applied my texture back to the sword so it looks good and acceptable to be imported into the game engine.

Overall I finished my sword in the best way I could as of how I followed my work flow so that I’m organised and ready to continue on improving my game because of how I know the main work flow that I have to follow to create many different objects in my game.

UV Map Creation in Maya

In today’s lesson I had the task of creating a UV map out of one of my created cubes. When I created my cube I then clicked on automatic in the UV section as that meant that I had a UV map of all the 6 sides of the cube.

When I created the UV map I then linked all the edges necessary to make the net of the cube. With the newly created net in the UV map I then had to implement a Minecraft TNT Diffuse. Then I had to match up the UV map’s boxes of the cube with the ones of the TNT diffuse so they match and make the texture look correct and make it acceptable for it to be used in the final  game.

Once that was completed I then moved on to an object that would be more complicated to texture. To create that shape I ended up adding in a doughnut/coin type shape that I changed the vertex’s of to make the shape look really random.

From:                                                            To:

My next objective was to make the UV map for that specific shape so that it would be possible to add a texture to it. For there to be only two main shells I had to cut two lines on the shape with the cut UV edges tool. One cut would be on the inner ring part of the shape, and one on the outer part of the ring. When doing that it meant that I could use the UV map for texturing by clicking on the cylindrical section so that it makes three or more parts of the shape on a UV map.

When I was at that stage I then tried to attach some of the shells together to make larger shells. Some of the problems that occurred were like how some of the shells didn’t link properly which would of made huge problems with the textures once it was implemented.

When I made several attempts on the shells creation making there only be two main shells I tried a new technique of which meant that I would select one of the two shells on the shape to then use the planar button and type in the facing gizmo for it to then give me a full side of one of the main shells to make it easier to texture. With that I then did the same technique on the other side of the shape to create the second main shell. Quick tip, don’t try and change the shapes in the UV map when they’re in the grey square as it is easier to drag out the shapes, adjust them and then move the shapes back into the grey square or the shapes wont work in the UV map.

UV Mapper

This is a UV mapper. It is used in 3D modelling so that the creator can see on their objects if there is going to be any texturing problems. A way that you can tell whether there will be texturing problems is if the numbers are angled in different directions and that they don’t link together near the cuts. Also if that problem occurs then there will be problems with the texturing as it wold look all distorted and wrong.


Sword Creation in Maya

At the very start of my sword creation I had the task to at first copy the main blade part of the sword by using a box and scaling it out the the exact length of the blade. However I had to create the point of the blade by making a line down the middle of the blade to then extrude the bottom part of the line to create a point that would be similar to the sword.

I then had to duplicate that skill when making the handle as of how the ball part of the handle is. In that part I had to create separate lines in the handle part so they can be adjusted and scaled down

.

After that I also separated the handle from the blade as I had to make the thickness of the handle more obvious compared to the thickness of the blade. Whilst trying to do that some problems occurred such as the blade or handle would turn black because of how I either pressed the wanted button too many times or it wasn’t properly selected.

My next part of the sword that had to be completed was the golden hand guard curves that would create the distinct look of the sword. When creating the hand guard I made many mistakes of which was that I would accidentally press the extrude button too many times which would damage the look of the sword making it look less appealing. However when I was in the rhythm of extruding and rotating the objects to create the circular guard.

But when creating the guard I found out that I only had to create it on one side because I would then later on duplicate it by deleting the other half of the hand guard and the back of the sword so the hand guard part can be duplicated 3 times so when I decide on adjusting the sword when it’s all be duplicated it would be the exact same with all of the sides as of how they are all linked.

In the near future I will be adding a texture that I presume will be similar to the texture on the picture.

3D Modeling Coke Can Creation

In my 3D modeling session I had the task of creating a Coca Cola can in Maya. At the start I imported a picture of a side view of a Coca Cola can, of which I then also imported a top view (birds eye view) of a Coke can. I then scaled up each of the images to a appropriate scale.

I then viewed the Coke can side on the specific side view of which I then used the EP Curve tool to trace half of the picture as I traced the outer part of the can on the left side of the can. before doing that I had to change a default setting on the tool to 1 Linear as it was previously 3 Cubic. I had to change it so it can do straight and not curved lines, so I can get the best possible outline of the Coke can. When I separated the created line and the picture it showed the shape of the line.Screenshot (3).png

From that point I then created the cylinder part of the can of which meant that I had to change the X and V value so the line becomes a cylinder.Screenshot (4).png

My next objective was to remove the unnecessary amount of polygons on the can as that meant that the Coke can would take a stupid amount of time to render in the game which would result in a lot of lag, or even to the point of the game crashing. When observing the polygons I then double clicked the outer rings that circle the can as I had to select several of the rings to then remove them so there is less polygons for the game to render.Screenshot (5).png

After that I had to do the same for the top and bottom of the can. However I had to change a setting on the selecting option from Marquee to Drag so it is easier to select a larger and more specific section of the can. When editing the top and bottom section of the can I needed to remove and then add a new large face by selecting the edges to create a new face for the can.

The next step was to add a texture to the Coke can. I did that by selecting the cylinder mode and then selecting the object mode so everything is selected. Then I right clicked to get the option to click on add favorite material and clicked on Blinn then file so I can import the Coke can diffuse for the can to have the right texture.Screenshot (7).png

When that was completed I followed the same method to then changed the top and bottom of the can to a silver. That was the end of what I completed at that following task.

Introduction to 3D Modeling

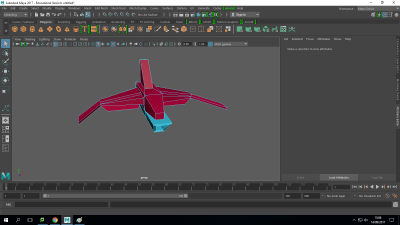
My first encounter with 3D Modeling was interesting as it had its ups and downs with how I almost found out every problem that could go wrong when wanting to create my own type of space ship. Maya at first is a surprisingly simple with it having great visuals as results. At first I was experimenting with the shapes that I can use, so I created a cube of which I then tested the freedom and creativity of the shape.

After creating the cube I then discovered an Extrude button that made one specific face of my cube the option to extend and change the size of the new duplicated shape that was made identical thanks to the Extrude tool. I then created the front end of the space ship by moving the adjustable cubes on the angles to make the cockpit part of the ship more pointed and triangular shaped whilst the extrude tool made sure it was connected and the same size and length as the main body of the ship. At that stage I made a easy mistake that was because I pressed the Extrude button more times on the same face which damaged the structure of ship.

At that stage I hadn’t made that many mistakes even though I didn’t have any previous experience in any 3D modeling software. As I gradually then started to make some wings of which I encountered the same mistake of an over obsessive amount of clicks on the extrude button.

I then continued creating the wings by maneuvering the ends of the wings to create a more arched and pitchfork like shape to the front of the ship. In addition I added an engine type area at the back of the ship and a lower cannon at the bottom of the ship as they were all created because of the Extrude tool as they used the same feature and each have a similar way of being made.

Screenshot (2)

Then at the end of my creation of my space ship I had the idea of making the ship look aesthetically pleasing by adding colour. I added colour to certain parts of my ship by right clicking on it, to then go on assign favorite material to then go on blinn so I could change the colour on one of the colour wheels to change the main body of the ship and wings to red, also i changed the colour of the lower cannon, with the engine and inside cannon part to the colour orange to represent power. I am happy with how my first session/creation went saying I had no previous experience and had no defiant idea of how I wanted the space ship to look.